Contents
A well-hung interior door does more than simply divide spaces; it contributes significantly to the aesthetics, functionality, and overall comfort of your home. A door that swings freely, latches securely, and closes without binding enhances daily living and underlines the quality of your interior design. Whether you are replacing an old door or undertaking a new build, understanding how to hang an interior door is a foundational skill that ensures both beauty and practicality.
This guide will walk you through the essential steps for successful door installation, from preparing the opening to fine-tuning the hinges. Achieving a perfectly smooth operation requires attention to detail, proper tools, and a methodical approach, all of which we will cover to help you achieve a professional finish. From the initial measurements to the final adjustments, we will ensure your new door integrates seamlessly into your modern home design.
Understanding the Components Before You Begin
Before you embark on the journey of hanging an interior door, it is crucial to familiarize yourself with the key components involved. This understanding forms the backbone of a successful door installation, ensuring you select the right materials and approach the task with confidence.
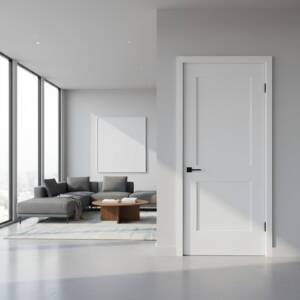
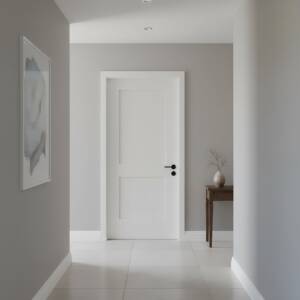
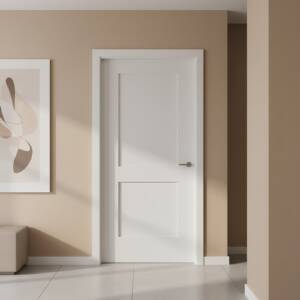
First, consider the door slab itself. Modern homes often feature flush doors or shaker doors, both celebrated for their minimalist aesthetics and clean lines. Many of these utilize a solid wood construction, often made from solid wood, which offers superior sound insulation, durability, and a more substantial feel compared to hollow-core alternatives. The choice of materials directly impacts the door’s weight and, consequently, the effort required for installation and the type of hinges needed.
Next, the door frame provides the structural opening into which the door will be set. This includes the jambs (vertical sides), head (top piece), and sill (bottom piece, for exterior doors, less common for interior). Ensuring the frame is plumb, level, and square is paramount, as any imperfections here will directly affect the door’s operation. Pre-hung doors come with the frame already assembled, simplifying the process for many homeowners and contractors.
Finally, hardware like hinges and the handle/lockset are integral. Hinges bear the full weight of the door and must be appropriately sized and spaced to allow smooth rotation. Selecting high-quality hardware not only enhances the door’s functionality but also adds to the overall aesthetics and longevity. Investing in quality components from the outset can prevent common door problems down the line.
Understanding these elements allows for a more informed approach to installation, setting the stage for a door that operates flawlessly for years to come. For those looking to increase their home’s value and refine their interior, choosing durable, high-quality doors is a significant step, as discussed in how high-quality interior doors can increase your home’s value.
Essential Tools and Materials
Before you begin the door installation process, gather all necessary tools and materials. Having everything on hand will streamline the project and ensure accuracy, which is essential for a smooth-operating door.
Tools You’ll Need:
- Measuring Tape: For precise measurements of the rough opening and door slab.
- Level: To ensure the door frame and door are perfectly plumb and level.
- Plumb Bob: For verifying vertical alignment.
- Hammer: For tapping shims and nails.
- Drill/Driver: For pre-drilling holes and securing screws.
- Chisel: For mortising hinge and strike plate recesses (if not pre-mortised).
- Utility Knife: For scoring shims.
- Clamps: To secure the door or frame temporarily.
- Wood Shims: Crucial for plumbing and leveling the frame.
- Caulk Gun and Caulk: For sealing gaps.
- Safety Glasses: Always protect your eyes.
Materials to Prepare:
- Door Slab: Ensure it’s the correct size and type for your opening, whether a flush door or shaker door.
- Door Frame/Jamb Kit: If not using a pre-hung door.
- Hinges: Typically three hinges for standard interior doors, ensuring they match your door’s weight and finish.
- Screws: Various lengths for hinges, strike plate, and jambs.
- Door Handle/Lockset: Choose a style that complements your interior design.
- Wood Glue: For frame assembly if necessary.
- Having these items ready minimizes interruptions and allows you to focus on the precision required for a perfect door installation.
Step-by-Step Guide on How to Hang an Interior Door
Successfully hanging an interior door involves a series of precise steps. Following this detailed guide will allow you to achieve professional results, ensuring your door operates smoothly and looks exceptional.
1. Prepare the Rough Opening
The foundation of a well-hung door is a properly prepared rough opening. Measure the width and height of the opening carefully. The width should be roughly two inches wider than the door slab, and the height approximately two-and-a-half inches taller. Use your level and plumb bob to check if the walls are plumb and the floor is level. Any significant deviations here will need to be corrected before proceeding, as even minor imperfections can lead to alignment issues with your door. This initial step is critical for a smooth door installation.
2. Install the Door Frame
If you are working with a bare rough opening, your first task is to assemble and install the door frame (jambs and head). Meticulously follow the manufacturer’s instructions for assembly. Once assembled, carefully position the frame into the rough opening. Use shims strategically at the top, bottom, and hinge locations to make the frame perfectly plumb and level. Secure the frame to the wall studs using screws, ensuring not to overtighten and distort the frame. Regularly check with your level as you work to maintain accuracy. This stage is crucial for providing a stable structure for hanging an interior door.
3. Mortise for Hinges (if not pre-mortised)
If your door slab and frame are not pre-mortised for hinges, you will need to create recesses for them. Position the hinges on the door slab: typically 7 inches from the top and 11 inches from the bottom, with the third hinge centered between the two for standard height doors. Trace the hinge outline onto the door edge and the door frame. Using a sharp chisel, carefully cut out the mortises to the exact depth of the hinge leaf, allowing the hinge to sit flush with the wood surface. Precision here prevents the hinge from binding.
4. Attach Hinges to Door Slab
Once your mortises are ready, screw the hinge leaves securely to the door slab. Use the provided screws, ensuring they are driven straight and flush. For added strength, especially with solid wood doors, consider using longer screws for the hinge leaf that attaches to the door frame, anchoring into the framing studs behind the jamb. This extra length enhances the integrity of the door’s hold and prevents future sagging.
5. Hang the Door
This is perhaps the most critical step in how to hang an interior door. With assistance, lift the door slab into the frame, aligning the hinge leaves on the door with their corresponding leaves on the frame. Insert the hinge pins, working from the top down. Once all pins are in place, gently open and close the door several times to check its initial swing. It should move freely without rubbing against the frame or the floor.
6. Adjusting Door Hinges for Smooth Operation
After initially hanging the door, you will likely need to perform some adjusting door hinges to achieve perfect alignment and smooth operation. This fine-tuning is what makes a door truly functional. Examine the gaps around the door: the reveal should be consistent (typically 1/8 inch to 3/16 inch) around the top and sides. If the door rubs at the top, you might need to slightly loosen screws on the top hinge and re-shim the frame or even slightly bend the hinge pin. If it sags or rubs at the bottom, the bottom hinge might need similar attention, or shims behind the frame’s bottom hinge mortise.
- To move the door closer to the latch side: Tighten the hinge screws that penetrate the framing studs behind the hinge, particularly the top hinge.
- To move the door away from the latch side: Loosen the hinge screws, add a thin shim behind the hinge leaf in the frame mortise, and re-tighten.
- If the door binds against the jamb: You may need to slightly adjust the screws on the problematic hinge at the jamb or even slightly bend the hinge pin to apply pressure.
Persistent rubbing may indicate the door frame itself is out of square or plumb, requiring more extensive adjustments with shims behind the jambs. Patience and incremental adjustments are key here. Effective adjusting door hinges ensures the door seals properly, enhancing privacy and energy efficiency.
7. Install the Doorknob and Strike Plate
With the door swinging freely, the final step is to install the doorknob/lockset and the strike plate. Follow the manufacturer’s instructions for the specific hardware you chose. Ensure the latch bolt operates smoothly and extends fully into the strike plate opening when the door is closed. The strike plate will need to be mortised into the door frame, similar to the hinges, so it sits flush. Test the operation repeatedly to confirm everything is engaged correctly.
Common Issues and Troubleshooting
Even with careful door installation, issues can arise. Knowing how to troubleshoot helps maintain the longevity and functionality of your doors. For general inquiries, our guide on 5 common door problems and their best solutions offers further insight.
- Door Rubbing Against the Frame: This is often due to an improperly shimmed frame or hinges that are not perfectly flush. Re-check the frame’s plumb and level. For minor rubs, adjusting door hinges by bending hinge pins slightly can sometimes resolve the issue.
- Door Sagging: Usually indicates loose hinge screws or hinges that aren’t adequately anchoring into the framing. Use longer screws or reinforce the hinge area.
- Door Doesn’t Latch Properly: The strike plate might be misaligned. Adjust its position on the jamb vertically or horizontally until the latch bolt engages smoothly.
- Squeaky Hinges: A common and easy fix! A few drops of lubricant (like spray lithium grease or even cooking oil) on the hinge pins usually solves this. For a comprehensive approach to maintenance, refer to how to maintain your interior doors.
Elevate Your Space with Properly Hung Doors
Mastering how to hang an interior door is a valuable skill that contributes significantly to the functionality and aesthetics of any space. Properly installed doors, whether flush door or shaker door styles, enhance privacy, provide sound insulation (especially with solid wood constructions), and contribute to the overall luxurious feel of your home. The precision involved in installation and adjusting door hinges directly impacts the user experience, ensuring smooth operation and long-term durability.
At Evolux Doors, we understand the importance of quality and precision in every aspect of interior design. Our range of modern, high-quality doors, crafted from materials like solid wood, offers the perfect blend of durability, aesthetics, and functionality for any home. We invite homeowners, interior designers, and contractors to explore our selections, which are designed to complement modern homes and elevate any interior space.
If you are aiming to enhance your projects with superior doors, consider the vast possibilities offered by Evolux Doors. We provide premium European-style doors that meet the highest standards of craftsmanship and design. For those interested in furnishing their projects with high-quality interior doors or becoming a distributor, we encourage you to contact us directly to learn more about our products and wholesale opportunities.
FAQs
What tools do I need to hang an interior door?
You’ll typically need a tape measure, level, drill, screwdriver, shims, a utility knife, and a saw (like a miter saw or handsaw) for trimming. Safety glasses and gloves are also recommended.
How do I prepare the door frame before hanging a new door?
Ensure the door frame is plumb, level, and square. You may need to remove old hinges and shims, clean the opening, and make any necessary repairs to the jambs or header.
Can I hang an interior door by myself?
While it’s possible for experienced DIYers, hanging an interior door is much easier and safer with two people. A second person can help support the door, especially when aligning it in the frame.
What common problems might I encounter when hanging an interior door?
Common issues include the door binding, not closing properly, having uneven gaps, or sagging. These are typically resolved by adjusting shims, checking for plumb/level, or re-mortising hinges.